Intro to version control with git and GitHub
Preamble
This a workshop for IDDO’s coding club to introduce complete beginners to version control with git and the many pros to using GitHub. During this workshop, we will:
- Learn how to initialise a local repository, how to make commits, and how to go back to past versions of our repo
- Learn how to push our repository to GitHub, how to fork a GitHub repository, and how to collaborate through pull requests
- Learn some other neat features of GitHub, such as Overleaf integration and github.io!
This workshop is for absolute beginners. Version control is confusing! Once you’ve got through the basics, here are some resources for different skills levels:
- Our Coding Club’s tutorial for setting up a lab repo
- Git is my lab book A compendium of guides/tutorials
- and of course, your friendly neighbourhood LLM is absolutely welcome :)
To complete this workshop, we’ll assume you have git on your machine and that you have an account set up on GitHub.
Version control: why are we here?
Have you ever found yourself hours or days into a change to a coding or stats project, only to realise you need to go back?
It’s times like these when version control can be very powerful! By tracking your progress you can:
- go back to specific versions of your code
- track your progress with annotations on each major change to your code (like a lab book)
- try out new additions to your code without losing a stable version of it
One widely-used system for version control is git.
In combination with a platform like GitHub, Git allows you to:
- keep a backup of your code that you can pull down to different machines
- allow other people to see your code / track your progress (e.g. readers of a paper)
- collaborate with other people
Before we get started: the command line
Today, we’ll be driving git using the command line. In RStudio (or whichever IDE you’re using), navigate to the Terminal window. Welcome to the command line. Some useful commands:
pwd: print working directorycd: change directoriesmkdir: make directorymv: move (a file or files from one location to another)cp: copy (a file or files from one location to another)ls: list all files in a directoryless: view the contents of a fileman: show the manual for a command, with all the different options associated with it, e.g.man ls
If you’re unfamiliar, let’s have a quick play around with these. There are lots of other commands and interesting ways to use them but we’ll move on for now!
Our first repository
To make your first repository, navigate to the directory where you would like it to be located.
Repository AKA “repo”: think of this as a folder where all your code and other stuff goes. Each repo is a self-contained unit for a single project.
- “Local” repository: the version of your repo on your computer.
- “Remote” repository: the version of your repo on GitHub, for example.
Like so:
cd ~/  # let's put our repo in the home directory
mkdir best_project  # for example
cd best_project
git init
You can check that you have successfully initialised your repo by checking its status:
git status
Our first commit
There’s nothing in our repo yet! Let’s add a README, a text file that
will be the first thing a reader of your code looks at. This command
creates a file called README.txt and puts some text in it:
echo "a very nice readme" > README.txt
Try opening the file and checking that “a very nice readme” is in there. Then, check the status of your repo again. I get:
On branch main

No commits yet

Untracked files:
  (use "git add <file>..." to include in what will be committed)
    README.txt

nothing added to commit but untracked files present (use "git add" to track)
This tells a couple of important things. We’ll get to branches later, but importantly, the status message tells us the repo has no commits yet. Let’s remedy that!
Commit A discrete change to your repository. Each commit is a snapshot of the repository. Commits are a two-step process:
- Add files to *staging area*. (Or, prepare your snapshot.)
- Commit! (Take a photo!)
To add files to the staging area, we can use add:
git add README.txt
Check your repo’s status again. Has the README made it to the staging area?
Now commit:
git commit -m "my first commit"
The text that follows -m is the commit message. We write this
ourselves to give a human-readable description of changes in the new
commit.
The commit message is more important than you might think! Use it to track your own progress as you write your code: what are the key changes in each commit? Consider yourself in the future, when you’ve forgotten the train of thought you had as you wrote and edited your code: what will you need to know in order to find your place.
It might help to think of your set of commit messages as a lab book. In a wet lab, scientists use a lab book to track each of the things they do during their experiment, so that they have a record when their results don’t turn out how they would expect. This is what we should be using commit messages for!
Exercise: our second commit
-
Make a change to your repository. Edit your README, or add a file.
-
Check the status of your repository and add your changes to the staging area. This command will add all untracked changes to the staging area:
git add * -
Commit! Make sure you use a descriptive commit message.
-
Check your repo’s log - what does this tell us?
git log
Let’s get remote! To GitHub!
Now that we’re feeling super confident, let’s jump onto GitHub. GitHub is one cloud-based platform that hosts Git repositories - GitLab and Bitbucket are widely-used alternatives. There are lots of features of GitHub that you can take advantage of with minimal confidence with the command line and git. For example:
- To backup projects
- GitHub and Overleaf talk to each other so that you can use GitHub to version control your LaTeX documents. I have used this feature very successfully on papers and my PhD thesis. Highly recommend!
- To share code
- Journals increasingly require code to be open access along with data supporting peer-reviewed publications. GitHub is a useful platform for this as everyone can see the version history of your code!
- The only limitation I’ve found here is that GitHub has a file size limit of 50MB. It can be necessary to put data elsewhere, but for code/figures/small datasets, GitHub will do the whole job.
- To collaborate on code
- GitHub allows users to work on the same code and track who has made which changes when.
- Collaboration is where I have the most trouble navigating all of the features of Git and GitHub, but it need not be complicated, I promise :)
- To maintain websites
- Surprise surprise, you have been using GitHub this whole time: this website is running through GitHub Pages. This website is a GitHub repo that is published as a static website.
Our first remote repository
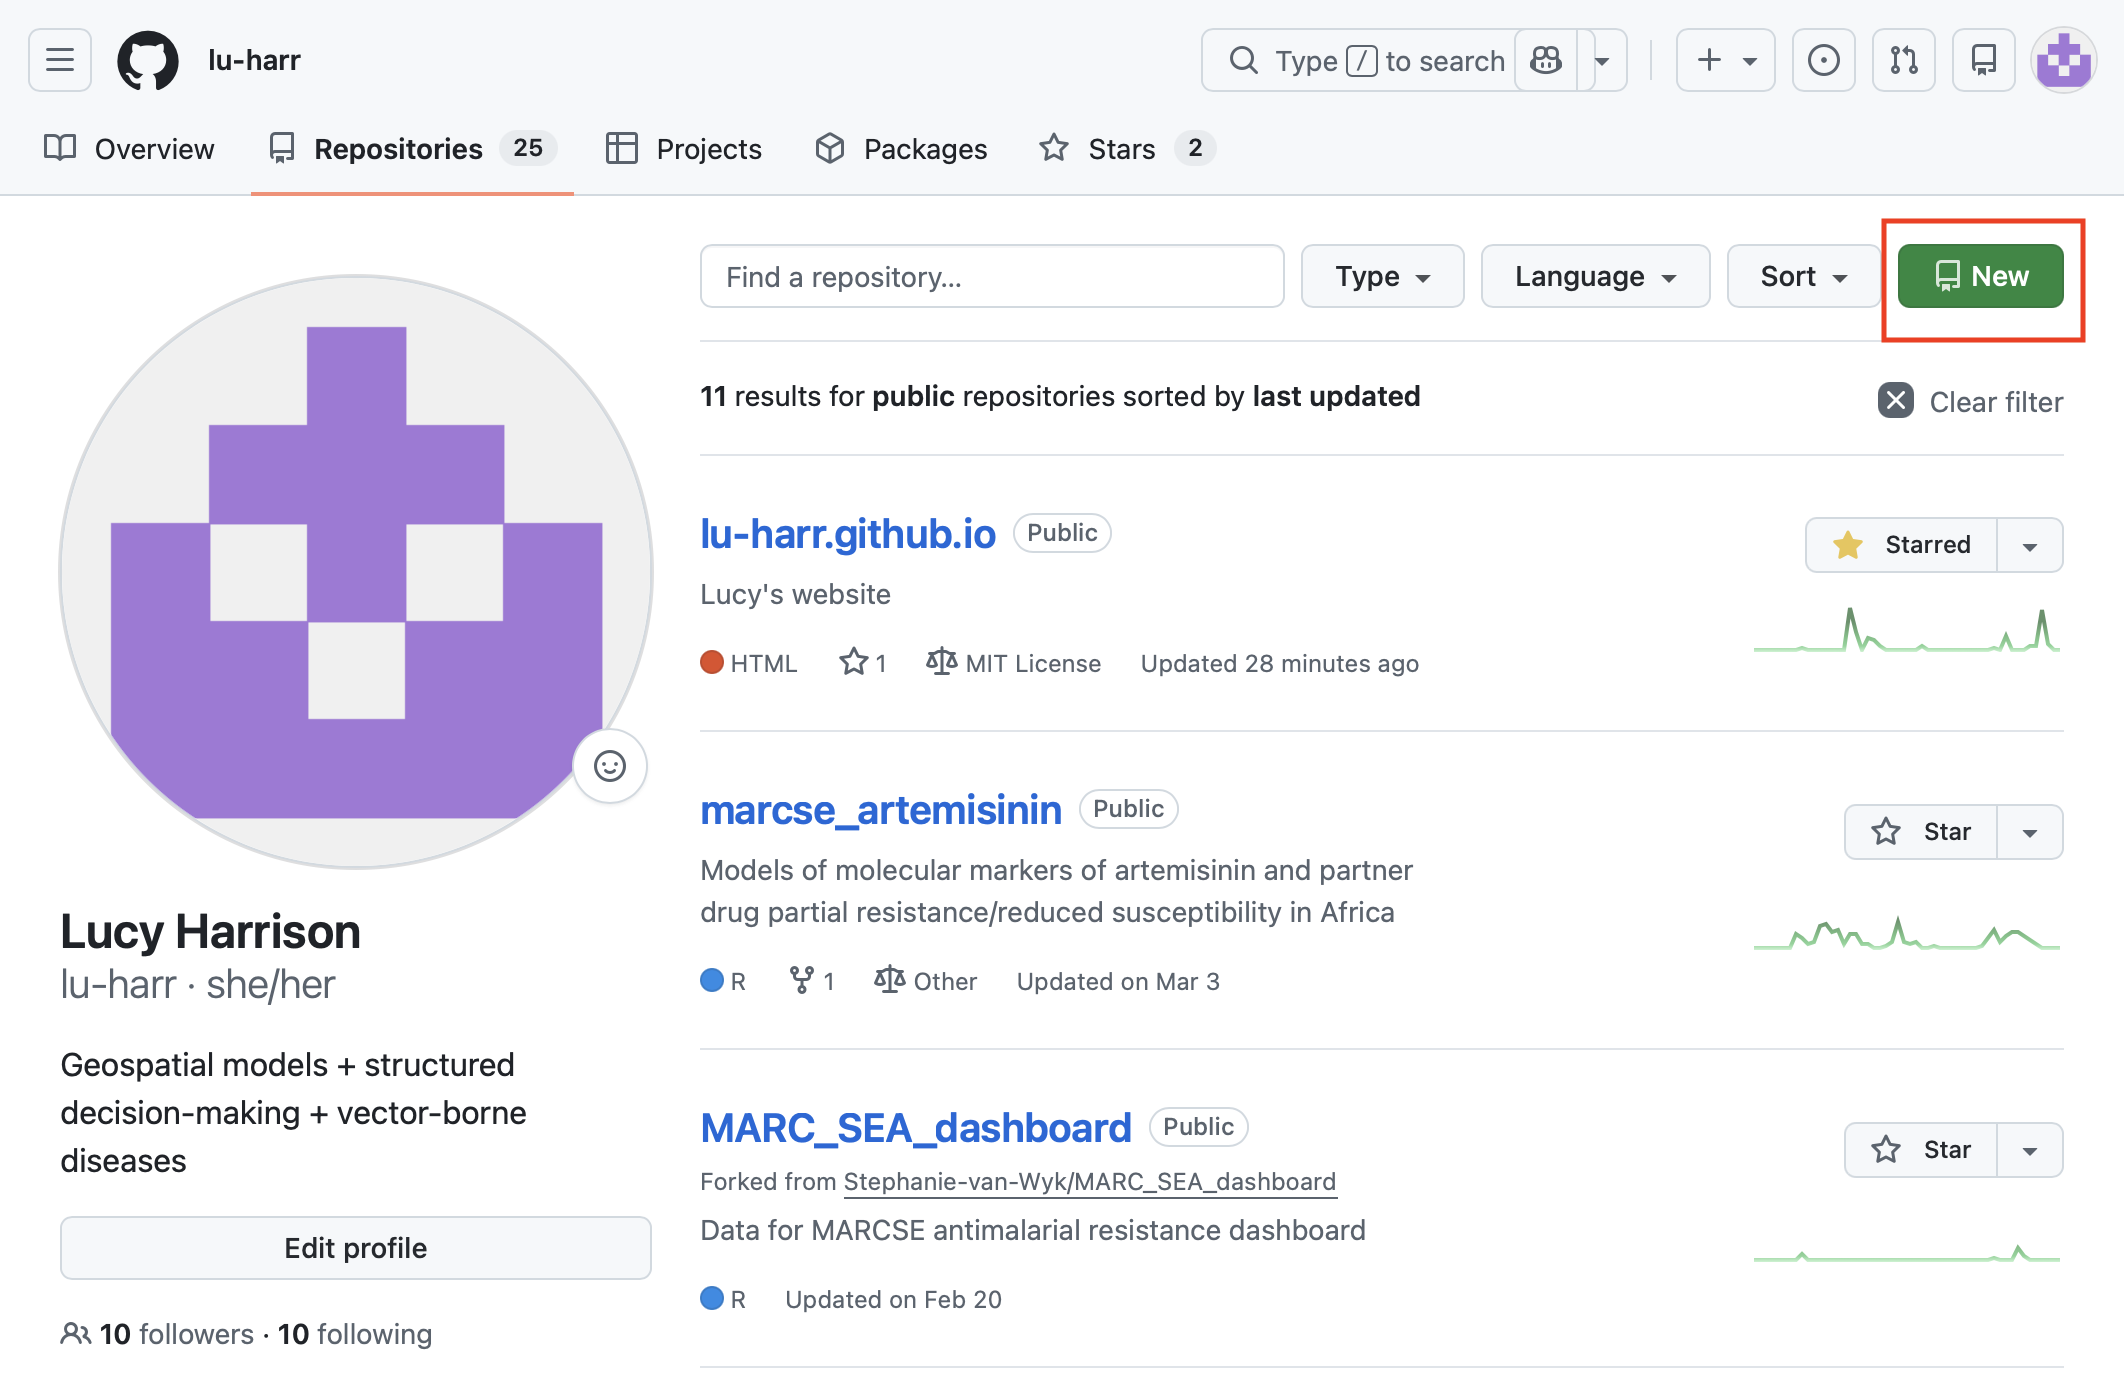
To create a repo on GitHub, navigate to the repositories page of your GitHub profile and click New.
Now to make some decisions:
- Give your repo a name
- Provide a short description. The shorter + clearer the better!
- Choose visibility:
- Public repos are visible to everyone. This is fine for us today.
- Private repos are visible only to users you specify. This is for when you don’t want everyone to be able to see your repo. For example, when you’re working on a paper but have not yet published it anywhere. Private repos can be made public later.
- Decide whether to add:
- A
README: all repositories need a README, but we can turn this off today as we have already initialised a README in the local version of our repo - A
.gitignore: a file that lets us control which files are added to commits. Very handy to keep sensitive files out of commits. - A license: a file that describes the terms under which other people can use your code.
- A
Click go! Congrats! Your first repo on GitHub!
Linking remote to local
We now have a local repository and a remote repository. It’s time to link them up!
Run the following commands in your terminal, from the directory where your local repo is located:
git remote add origin https://github.com/<your-github-username>/<your-remote-repo-name>.git
git branch -M main
git push -u origin main
Authentication
At this point, you’ll be prompted to input your GitHub username and a password. As of 2021, this “password” will be a personal access token - have a look here for instructions on how to make one.
Translated, the commands above mean:
- “This [local] repo corresponds to our repo on GitHub [which we nickname ‘origin’].”
- “Rename the central branch of my [local] repo to be ‘main’”
- “Push everything that’s in the ‘main’ branch of my local repo to ‘origin’.”
Branch
A series of related commits. You can maintain multiple branches in one repo, for example, to trial a change to the repo while maintaining a central, stable version.
If you’re familiar with the concept of a pointer, that’s what this is: in a single-branch repo, your branch points at your most recent commit, and moves forward as you add commits.
Step 2 isn’t necessary but is convention: until relatively recently, the default name for the central branch of Git repositories was “master”. However, the term’s historical association with “slave” in broader computer science + software engineering led Git and GitHub to change it. In fact, the branch in your local repo was probably already called “main”, but GitHub have included Step 2 in their guide to make sure it is.
We skated over another powerful Git operation in the list above:
Updates one or more branches, tags, or other references in a remote repository from your local repository, and sends all necessary data that isn’t already on the remote.
There is (of course) the opposite operation of git pull. When changes
have been made to your remote repo, pulling lets you bring those
changes down to your local repo.
The story so far …
Today we’ve learnt all the steps we’ll need to maintain a single-author git repo that we’re adding to one commit at a time. To recap, we:
- Put all of our code and outputs in a single folder
- Initialise a git repo in that folder
- Make regular commits as we update our work
- Push these commits to a remote repository, e.g., on GitHub
Collaboration
Here’s a quick taster of some of the terminology - we’ll go further into collaborating with git and GitHub at a future workshop.
One-way: cloning and forking
To use someone else’s code, without your changes being reflected in their code, you have a couple of options.
Cloning involves downloading an external repo onto your local machine.
Forking involves making a copy of an external repo within GitHub - you can make changes to your forked repo where other users can see them.
Two-way: pull requests
To make edits to someone else’s code when you don’t have permission to write to it directly, you can submit a pull request. This means proposing your changes to a repo’s authors who review the changes and can accept to merge them in.